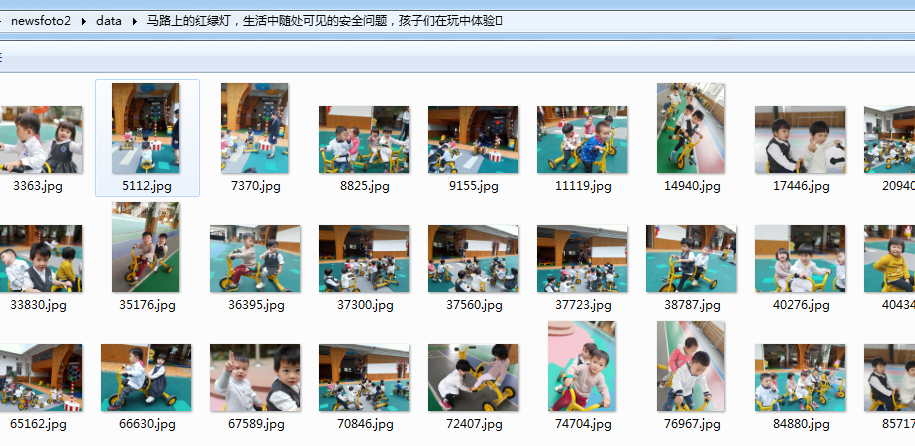
scrapy 抓取app 掌通家园 图文页面
接口需要通过fiddler来抓包获取,下载下来的图片是原始高清大图无水印

爬虫处理页面deal.py
import scrapy
import bs4
import csv
from ..items import newsfoto2Item
# 需要引用mrleItem,它在items里面。因为是items在deal.py的上一级目录,所以要用..items,这是一个固定用法。

class newsfoto2Spider(scrapy.Spider):
#定义一个爬虫类newsfotoSpider。
    name = 'newsfoto2'
    #定义爬虫的名字。
    allowed_domains = ['web.szy.cn']
    #定义爬虫爬取网址的域名。
    start_urls = []
    #定义起始网址。
    for x in range(1):
        url = 'https://web.szy.cn/content/growth?contentId=356533194&contentType=8'
        start_urls.append(url)


    def parse(self, response):
    # #parse是默认处理response的方法。
    #     bs = bs4.BeautifulSoup(response.text,'html.parser')
    #     #用BeautifulSoup解析response。
    #     datas = bs.find_all('li',class_='clearfix')
    #     for data in  datas:
    #     #遍历data。
    #         #获取文章页地址
    #         # global articleUrl
            articleUrl = 'https://web.szy.cn/content/growth?contentId=356533194&contentType=8'

            yield scrapy.Request(articleUrl, callback=self.parse_job)
#用yield语句把构造好的request对象传递给引擎。用scrapy.Request构造request对象。callback参数设置调用parsejob方法。

    def parse_job(self, response):
    #定义新的处理response的方法parse_job(方法的名字可以自己起)
        bs = bs4.BeautifulSoup(response.text, 'html.parser')

        item = newsfoto2Item()
        item['title'] = bs.find('div',class_="content-item content-desc").text.strip()
        try:
            item['video'] = bs.find('source')['src']
        except:
            item['video'] = '默认值'

        item['link'] = response.request.url  #response.request.url 关键点 得到上个函数传递过来的url
        try:
            item['wenzi'] = bs.find('div', class_="bai13").text.replace(u'\xa0', u'')
        except:
            item['wenzi'] = '默认值'
        # 抓取文章内容部分第一张图片地址
        item['picurl'] = ''

        #获取文章页全部图片
        item['urls'] = bs.find('div', class_="img-list-share").find_all('img')


        yield item
数据通道页面 pipelines.py
# -*- coding: utf-8 -*-

# Define your item pipelines here
#
# Don't forget to add your pipeline to the ITEM_PIPELINES setting
# See: https://docs.scrapy.org/en/latest/topics/item-pipeline.html
import scrapy
from scrapy.spiders import Request
from lxml import etree
from scrapy.pipelines.images import ImagesPipeline  # 下载图片的管道
import os
import openpyxl
import random


class Newsfoto2Pipeline(object):
#定义一个JobuiPipeline类,负责处理item
    def __init__(self):
    #初始化函数 当类实例化时这个方法会自启动
        self.wb =openpyxl.Workbook()
        #创建工作薄
        self.ws = self.wb.active
        #定位活动表
        self.ws.append(['标题', '地址', '视频', '图片地址', '文章内容'])
        #用append函数往表格添加表头

    def create_dir(self, path):
                # 去除首位空格
                path = path.strip()
                # 去除尾部 \ 符号
                path = path.rstrip("\\")
                # 判断路径是否存在
                isExists = os.path.exists(path)
                # 判断结果
                if not isExists:
                    # 如果不存在则创建目录
                    # 创建目录操作函数
                    os.makedirs(path)
                    print(path + ' 创建成功')
                    return True
                else:
                    # 如果目录存在则不创建,并提示目录已存在
                    print(path + ' 目录已存在')
                    return False


    def process_item(self, item, spider):
    #process_item是默认的处理item的方法,就像parse是默认处理response的方法
        plist=[]
        for url in item['urls']:
             plist.append(url.get('data-src'))
        stra=','
        line = [item['title'], item['link'], item['video'], stra.join(plist), item['wenzi']] #join() 方法用于将序列中的元素以指定的字符连接生成一个新的字符串
        #把名称、链接、视频地址都写成列表的形式,赋值给line
        self.ws.append(line)
        #用append函数把数据都添加进表格
        #新建以标题命名的文件夹
        path = "data/" + item["title"].replace('/','')
        self.create_dir(path)

        with open(path + '/'+ item["title"].replace('/','') +'.txt', 'w') as file:

            # plist=[]
            # for txt in item['wenzi'].split(',')[0:-1]:
            #     strr = etree.HTML(txt).xpath('//p/text()')
            #     plist.append(strr[0])
            # stra=','
            # item['wenzi'] = stra.join(plist)

            file.write(item['wenzi'])
        return item
        #将item丢回给引擎,如果后面还有这个item需要经过的itempipeline,引擎会自己调度

    def close_spider(self, spider):
    #close_spider是当爬虫结束运行时,这个方法就会执行
        self.wb.save('./newsfoto.xlsx')
        #保存文件
        self.wb.close()
        # 关闭文件


class ImagesspiderPipeline(ImagesPipeline):
      #scrapy自带的处理函数
    def get_media_requests(self, item, info):

        # '''获取图片的url,通过Request方法,保存图片'''

        for imgurl in item['urls']:
            downurl = imgurl.get('data-src')

            url1=item['link'].split('/')[0:-1]
            str='/'
            url2=str.join(url1)+'/'  #得到http://www.xinhuanet.com/foto/2019-10/30/
            photourl = downurl

            if 'http' in photourl:
                downurl2 = photourl
            else:
                downurl2 = url2 + photourl

            downurl2 = downurl2.replace('/w/690','')   #去掉尺寸限制,获取原始图片
            downurl2 = downurl2.replace('/dx/15','/dx/6000')  #去掉水印

            yield  Request(downurl2, meta={'item': item})        # # # # 这里meta={'item': item},目的事件item传递到file_path中


    def file_path(self, request, response=None, info=None):
        # '''图片保存的路径'''
        item = request.meta['item']
        #replace('/','')把地址中的/去掉 避免文件夹层级出错
        path = item["title"].replace('/','')

        # print('得到的地址'+request.url)
        # img_name = request.url.split('/')[-8]+'.jpg' #获取xxxx.jpg
        img_name = str(random.randint(1,101000)) + '.jpg'
        #img_name= item["title"].replace('/','')
        # 图片路径将是data/文章标题/xxx.jpg data在setting里设置 文件夹没有会自动创建
        # path = path + '/' + img_name + '.jpg'
        path = path + '/' + img_name
        print("图片路径+++++++++++++", path)


        return path
items。py
# -*- coding: utf-8 -*-

# Define here the models for your scraped items
#
# See documentation in:
# https://docs.scrapy.org/en/latest/topics/items.html

import scrapy


class newsfoto2Item(scrapy.Item):
#定义一个类mrleItem,它继承自scrapy.Item
    picurl = scrapy.Field()
    title = scrapy.Field()
    wenzi = scrapy.Field()
    link = scrapy.Field()
    video = scrapy.Field()
    urls = scrapy.Field()
setting.py
# -*- coding: utf-8 -*-

# Scrapy settings for newsfoto project
#
# For simplicity, this file contains only settings considered important or
# commonly used. You can find more settings consulting the documentation:
#
#     https://docs.scrapy.org/en/latest/topics/settings.html
#     https://docs.scrapy.org/en/latest/topics/downloader-middleware.html
#     https://docs.scrapy.org/en/latest/topics/spider-middleware.html

BOT_NAME = 'newsfoto2'

SPIDER_MODULES = ['newsfoto2.spiders']
NEWSPIDER_MODULE = 'newsfoto2.spiders'


#存储路径 决定文件存储在哪个文件夹下面
IMAGES_STORE = 'data'
# 定义接受图片的变量
IMAGES_URLS_FIELD = 'urls'
# Crawl responsibly by identifying yourself (and your website) on the user-agent

    # 'Accept': 'text/html,application/xhtml+xml,application/xml;q=0.9,*/*;q=0.8',
    # 'Accept-Language': 'en',
USER_AGENT = 'Mozilla/5.0 (Windows NT 10.0; WOW64) AppleWebKit/537.36 (KHTML, like Gecko) Chrome/71.0.3578.98 Safari/537.36'

# Crawl responsibly by identifying yourself (and your website) on the user-agent
#USER_AGENT = 'newsfoto (+http://www.yourdomain.com)'

# Obey robots.txt rules
ROBOTSTXT_OBEY = False

# Configure maximum concurrent requests performed by Scrapy (default: 16)
#CONCURRENT_REQUESTS = 32

# Configure a delay for requests for the same website (default: 0)
# See https://docs.scrapy.org/en/latest/topics/settings.html#download-delay
# See also autothrottle settings and docs
DOWNLOAD_DELAY = 0.5
# The download delay setting will honor only one of:
#CONCURRENT_REQUESTS_PER_DOMAIN = 16
#CONCURRENT_REQUESTS_PER_IP = 16

# Disable cookies (enabled by default)
#COOKIES_ENABLED = False

# Disable Telnet Console (enabled by default)
#TELNETCONSOLE_ENABLED = False

# Override the default request headers:
#DEFAULT_REQUEST_HEADERS = {
#   'Accept': 'text/html,application/xhtml+xml,application/xml;q=0.9,*/*;q=0.8',
#   'Accept-Language': 'en',
#}

# Enable or disable spider middlewares
# See https://docs.scrapy.org/en/latest/topics/spider-middleware.html
#SPIDER_MIDDLEWARES = {
#    'newsfoto.middlewares.NewsfotoSpiderMiddleware': 543,
#}

# Enable or disable downloader middlewares
# See https://docs.scrapy.org/en/latest/topics/downloader-middleware.html
#DOWNLOADER_MIDDLEWARES = {
#    'newsfoto.middlewares.NewsfotoDownloaderMiddleware': 543,
#}

# Enable or disable extensions
# See https://docs.scrapy.org/en/latest/topics/extensions.html
#EXTENSIONS = {
#    'scrapy.extensions.telnet.TelnetConsole': None,
#}

# Configure item pipelines
# See https://docs.scrapy.org/en/latest/topics/item-pipeline.html
ITEM_PIPELINES = {
   'newsfoto2.pipelines.Newsfoto2Pipeline': 300,
   'newsfoto2.pipelines.ImagesspiderPipeline': 400,
}

# Enable and configure the AutoThrottle extension (disabled by default)
# See https://docs.scrapy.org/en/latest/topics/autothrottle.html
#AUTOTHROTTLE_ENABLED = True
# The initial download delay
#AUTOTHROTTLE_START_DELAY = 5
# The maximum download delay to be set in case of high latencies
#AUTOTHROTTLE_MAX_DELAY = 60
# The average number of requests Scrapy should be sending in parallel to
# each remote server
#AUTOTHROTTLE_TARGET_CONCURRENCY = 1.0
# Enable showing throttling stats for every response received:
#AUTOTHROTTLE_DEBUG = False

# Enable and configure HTTP caching (disabled by default)
# See https://docs.scrapy.org/en/latest/topics/downloader-middleware.html#httpcache-middleware-settings
#HTTPCACHE_ENABLED = True
#HTTPCACHE_EXPIRATION_SECS = 0
#HTTPCACHE_DIR = 'httpcache'
#HTTPCACHE_IGNORE_HTTP_CODES = []
#HTTPCACHE_STORAGE = 'scrapy.extensions.httpcache.FilesystemCacheStorage'


欢迎留下你的看法
共 0 条评论